
How to Tackle a Home Edit in Six Steps
Whether you need to transform a room to better meet your needs or are trying to fill some newfound free time, now is the perfect time to tackle a home edit. While you may not be able to fully redecorate at the moment, conducting a thorough space assessment and paring down to the most essential and beloved elements are important first steps that can have a significant—and immediate—impact on an area. Here, Little Rock, Arkansas-based interior designer Krista Lewis of K. Lewis Interior Design shares her six-step define-and-declutter process for clients who want to give their homes a fresh feel and improve function.
Step 1: Prioritize and take it one room at a time. If editing your entire house at once seems daunting, don’t panic. Take a deep breath and decide which space to tackle first. Lewis recommends starting with the rooms you spend the most time in, and that ultimately have the biggest impact on your quality of life, like your bedroom or living room.
Step 2: Define the purpose of the room and how you want it to feel. Think about how you want to use the space, and ask yourself questions that will help you make it as functional as possible. These include, how many family members— and pets—need to be accommodated? What time of day are you in the room? Is the space well lit? What equipment, like TV and audio, needs to be in the room? Is there specific furniture that you need to house the equipment?
Step 3: Take an inventory of the room’s current contents. This is the time to take a critical eye to all of the room’s components, from furniture to decorative items. Identify those that you want to keep, and those that you know you want to get rid of and/or donate. “We all have those hand-me-downs and pieces that have served as placeholders that we just haven’t upgraded,” Lewis says. “But there are some that are very important as memories to us.” Make a categorized list of everything (and remember, it’s okay to be sentimental).
Step 4: Remove everything from the room. While this might seem overwhelming, Lewis considers emptying the room an essential step so that you can start with a blank slate. It’s also a good opportunity to see the space with fresh eyes and consider all your options in terms of furniture placement, art placement, lighting, etc.
Step 5: Place the most important pieces from the “Keep” list back in the room. Starting with the highest priority pieces, begin building the room. In addition to the essential items, “These could be small, but have an emotional attachment, like art, accessories, mementos, and collections,” Lewis says. Ideally you would not put anything back in the room that does not support the purpose or the aesthetic, but Lewis acknowledges this could prove difficult if you plan to donate your sofa or your mattress and have yet to purchase a replacement.
Step 6: Create a realistic plan for completing the project. Now that you’ve successfully edited your space, consider what would truly complete the room—this could be a more comfortable sofa, a side table on which to set a drink, table lamps to add much needed light, a larger coffee table to accommodate a favorite collection, a new paint color, colorful accent pillows, or the perfect wallpaper (if you haven’t already, now would be an excellent time to enlist an interior designer, many of which are offering virtual consultations right now). “Make a list of the pieces that you need, and work towards the goal of completing the room,” Lewis advises, adding, “This could take weeks, months, or even years, but with a clear plan, you can make it happen.”
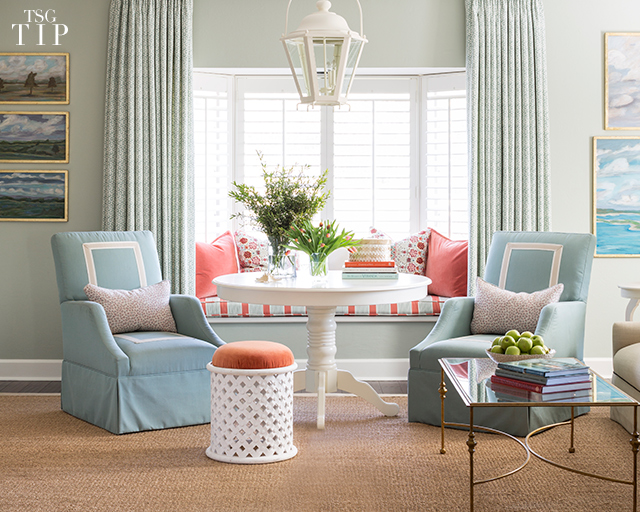
Photography by Rett Peek. TSG Tip 359 from Krista Lewis of K. Lewis Interior Design in Little Rock, Arkansas. K. Lewis Interior Design is featured in The Scout Guide Little Rock.


